Taking your Arduino IoT gas detection project to the next level! Basic gas detection setups using Arduino and sensors like the MQ-2 are a great introduction to building safety monitors for your home. But as we delve deeper, we can significantly improve the accuracy and functionality of these projects through sensor calibration and advanced features offered by platforms like Blynk.
This blog post is geared towards intermediate Arduino enthusiasts who want to refine their gas detection projects. We’ll explore sensor calibration techniques, create a Blynk app for real-time data visualization and push notifications, and delve into the code behind it all.
Why Calibrate Your Gas Sensor?
While convenient, basic gas detection setups using pre-calibrated sensors have limitations. Over time, sensor readings can drift due to factors like exposure to humidity, temperature changes, and aging. Uncalibrated sensors might provide false alarms or underestimate gas levels, potentially putting you at risk.
Regular calibration ensures your sensor maintains its accuracy and provides reliable data. The calibration process involves exposing the sensor to clean air (or a known concentration of gas for some models) and adjusting its internal parameters for optimal performance.
Read Also: How to Dress for Your Body Shape: Flattering Styles for Everyone
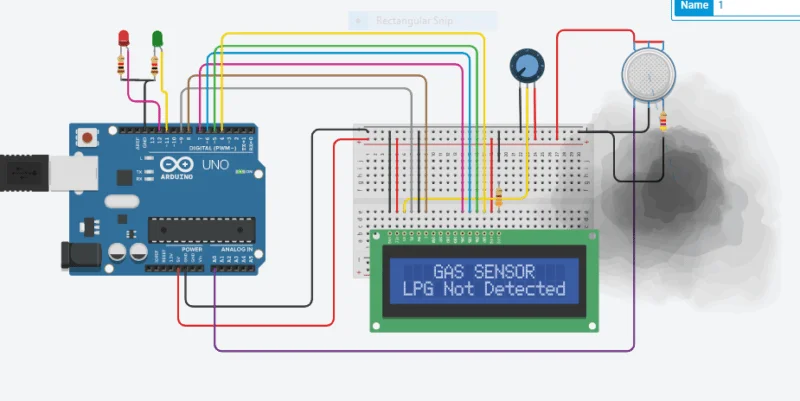
Components and Materials
- Arduino Uno (or compatible board)
- Gas Sensor (e.g., MQ-135 for general gas detection) – Choose a sensor with calibration capabilities. Double-check the specific calibration procedure for your chosen model.
- Breadboard
- Jumper wires
- LED (any color)
- Blynk app (available for iOS and Android)
Calibrating Your Gas Sensor (Using MQ-135 as an Example):
The calibration process will vary depending on your specific gas sensor model. Here’s a general guideline for calibrating an MQ-135 sensor for clean air:
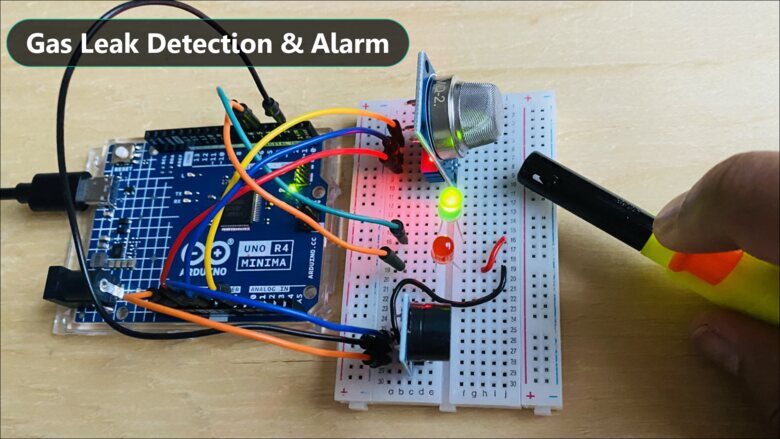
- Power Up and Warm Up: Connect your Arduino board, gas sensor, and LED to the breadboard according to the sensor’s datasheet (refer to resources for most sensor models online). Power on the Arduino and allow the sensor to warm up for a few minutes.
- Include the Sensor Library: In your Arduino IDE, download and install the necessary library for your gas sensor. Libraries often come bundled with the sensor purchase or can be found on the manufacturer’s website. For the MQ-135, libraries like “MQ135.h” are commonly available. Include the library at the beginning of your code using
#include <MQ135.h>. - Define Sensor Pin: In your code, declare a variable to store the analog pin your gas sensor is connected to (e.g.,
const int sensorPin = A0;). - Calibration Routine: Within your
setup()function, include a calibration function provided by your sensor library (consult the library documentation). This function typically exposes clean air to the sensor and adjusts its internal resistance for a baseline reading. An example function call might look likeMQ135.setBaseline(sensorPin). - Test and Monitor: After calibration, upload the code to your Arduino board. You can then use the serial monitor to view the sensor readings in real-time. Monitor the readings in a clean air environment and ensure they fall within the expected range specified in the sensor’s datasheet.
Advanced Blynk Integration
Blynk is a fantastic platform for creating user-friendly interfaces for your Arduino projects. We’ll leverage Blynk to visualize real-time gas sensor readings, set alert thresholds, and receive push notifications on your smartphone in case of exceeding gas levels.
- Set Up Blynk: Download and install the Blynk app on your smartphone. Create a new project in Blynk and note down your auth token, which will be used in the Arduino code.
- Design Your Blynk Interface: In the Blynk app, add the following widgets to your project:
- Gauge: This will display the real-time gas sensor readings in a visual format.
- Label: This will display the current gas level as a numerical value.
- Notification: This will be used to send push notifications to your phone when gas levels exceed a certain threshold.
- Blynk Virtual Pin Assignment: In your Arduino code, include the Blynk library (
#include <BlynkSimpleLib.h>) and define your Blynk auth token. Assign virtual pins in your code to correspond with the widgets you added in the Blynk app (e.g.,BLYNK_WRITE(V1, sensorValue)sends data to the gauge widget on virtual pin V1).
Code Breakdown
Here’s a basic code structure demonstrating sensor calibration, Blynk integration, and data visualization with notifications:
#include <MQ135.h> // Include sensor library (replace with specific library for your sensor)
#include <BlynkSimpleLib.h>

const int sensorPin = A0; // Analog pin connected to gas sensor
const char* authToken = "YOUR_BLYNK_AUTH_TOKEN"; // Replace with your Blynk auth token

MQ135 mq135 = MQ135(sensorPin); // Create an instance of the sensor object

BlynkSimpleLib blynk(authToken); // Initialize Blynk with auth token

float sensorValue = 0.0; // Variable to store sensor reading
int threshold = 700; // Set gas level threshold for notification (adjust based on sensor datasheet)

void setup() {
  Serial.begin(9600); // Open serial communication for monitoring (optional)
  mq135.setBaseline(sensorPin); // Calibrate sensor using library function
  blynk.begin(Serial); // Start Blynk communication
}

void loop() {
  blynk.run(); // Update Blynk connection
  sensorValue = mq135.readSensor(); // Read sensor value

  Serial.print("Sensor Value: "); // Optional: Print sensor value to serial monitor
  Serial.println(sensorValue);
Explanation
- We include the necessary libraries for the gas sensor and Blynk communication.
- We define the sensor pin, your Blynk auth token, and a variable to store sensor readings.
- An
MQ135object is created to interact with the sensor. - The
setup()function initializes serial communication (optional for monitoring), performs sensor calibration, and starts the Blynk connection. - The
loop()function continuously reads sensor data, updates the Blynk app with the value (sent to the gauge widget on virtual pin V1), and checks if the threshold is exceeded. If so, a push notification is sent to your phone.
Project Enhancements (Optional)
- Automatic Gas Mitigation: Connect an exhaust fan or solenoid valve to a digital pin on your Arduino. Based on sensor readings and thresholds, you can activate the fan or valve to automatically remove excess gas from the environment.
- Smart Home Integration: Explore platforms like IFTTT or openHAB to integrate your gas detection system with other smart home devices. For example, upon exceeding gas levels, you could trigger automated actions like turning on lights or sending an alert to your smart speaker.
Safety Considerations
It’s crucial to remember that DIY gas detectors are not replacements for professionally installed systems. While they can provide a basic warning system, they might not be suitable for environments with high gas risks. Always prioritize safety and consult with a qualified electrician or gas safety professional for recommendations on appropriate gas detection systems for your specific needs.
Conclusion
By incorporating sensor calibration and Blynk’s advanced features, you can significantly enhance your Arduino gas detection project. This blog post provided a basic framework, but feel free to experiment and customize it further!
In future blog posts, we might delve deeper into topics like integrating exhaust fan control, exploring smart home integrations, and exploring data logging capabilities for analyzing gas trends over time.
Let us Discuss
Have you built your own advanced gas detection system? Share your project setup, Blynk interface design, or any challenges you faced in the comments below! We’d love to see your creations and foster a discussion within the Arduino enthusiast community.